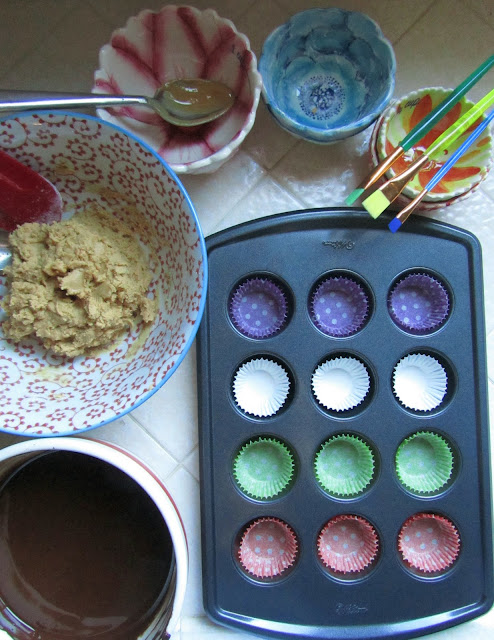
In honor of my pole vault back into the get fit saddle I decided to have one last hurrah in the treat department until Thanksgiving. In true form I went out with a bang by making dark chocolate (my fave, but you can just as easily use milk), homemade peanut butter cups. If you've never made them - get ready for goodness. They were so fun to make and turned out so marvelously I was shocked. Hold me...it's going to be a long few weeks.
It looks like a child's art project, doesn't it?
Homemade Chocolate Peanut Butter Cups
Filling - Ingredients
1/2C Peanut Butter
2T Butter
1/2C Confectioner's Sugar
1/2t Salt
Mix by hand or with hand mixer until smooth, but do not over mix.
Chocolate Coating - Ingredients
2C Ghirardelli 60% Cacao Chocolate Chips
8oz. Dark Chocolate, chopped
1T Vegetable Oil
Place chocolate and oil in mixing bowl and microwave on medium heat at 30 second intervals. Stop and stir every half minute until chocolate can be easily stirred - do not overheat. The ideal temperature for dark chocolate is between 88 and 90 degrees; 86 to 88 degrees for milk chocolate. Usually we use a double boiler to temper the chocolate, but I was short on time (read wanted to eat these before the clock to watching what I eat-ville started) so just used the microwave method and it worked fine. I made sure to keep checking the temp to be careful with the chocolate. It was painless and the results were excellent.
Begin by gathering a mini-muffin pan, mini cake liners (I got mine at Sur La Table - they have such a fun selection), and some little paint brushes (think Rite-Aid Crayola kids brushes).
Begin by spooning a bit of chocolate into a cup, then take your
artist's brush and "paint"the chocolate up the sides.
Once filled, allow the chocolate to set (become firm) before adding peanut butter.
This keeps the peanut butter mixture from sinking through
to the bottom of the cup.
In the meantime make little pb balls to place in each center.
After each cup contains peanut butter begin covering with chocolate.
Notice how the chocolate is shiny? That's from a combo of
the oil addition and maintaining a right temperature.
You may have to periodically re-heat your chocolate.
Allow them to set at room temperature or place in the
refrigerator for about half an hour.
Et voila! The paper peeled off like a charm and these are de-lish!
(pardon the horrible lighting...thx for nothing daylight savings)
Super cute in treat bags, too.
I gave these to a friend of mine last night and she loved them -
packaging and all.
Super cute in treat bags, too.
I gave these to a friend of mine last night and she loved them -
packaging and all.
I guess I'm going to have to come up with some sort of better solution for lighting given our shorter days...aside from the pictures these turned out perfectly. If you are a fan of peanut butter cups, I couldn't recommend more highly! Sigh. Work out regimes.
p.s. - I was in the woods w/work yesterday, but will be catching up on your blogs today :)
p.s. - I was in the woods w/work yesterday, but will be catching up on your blogs today :)


